In this tutorial, you’ll learn how to Remove All Transitions from your Adobe Premiere Pro timeline in just a few clicks. By using the built-in Simplify Sequence feature, you can instantly clear both video and audio transitions without manually deleting each one.
Preparing Your Premiere Pro Project
Open your Premiere Pro project and select the sequence where you want to remove transitions. Ensure that all clips are visible in the timeline and that you have saved your work. This preparation helps prevent accidental changes to the wrong sequence.
How to Remove All Transitions in One Step
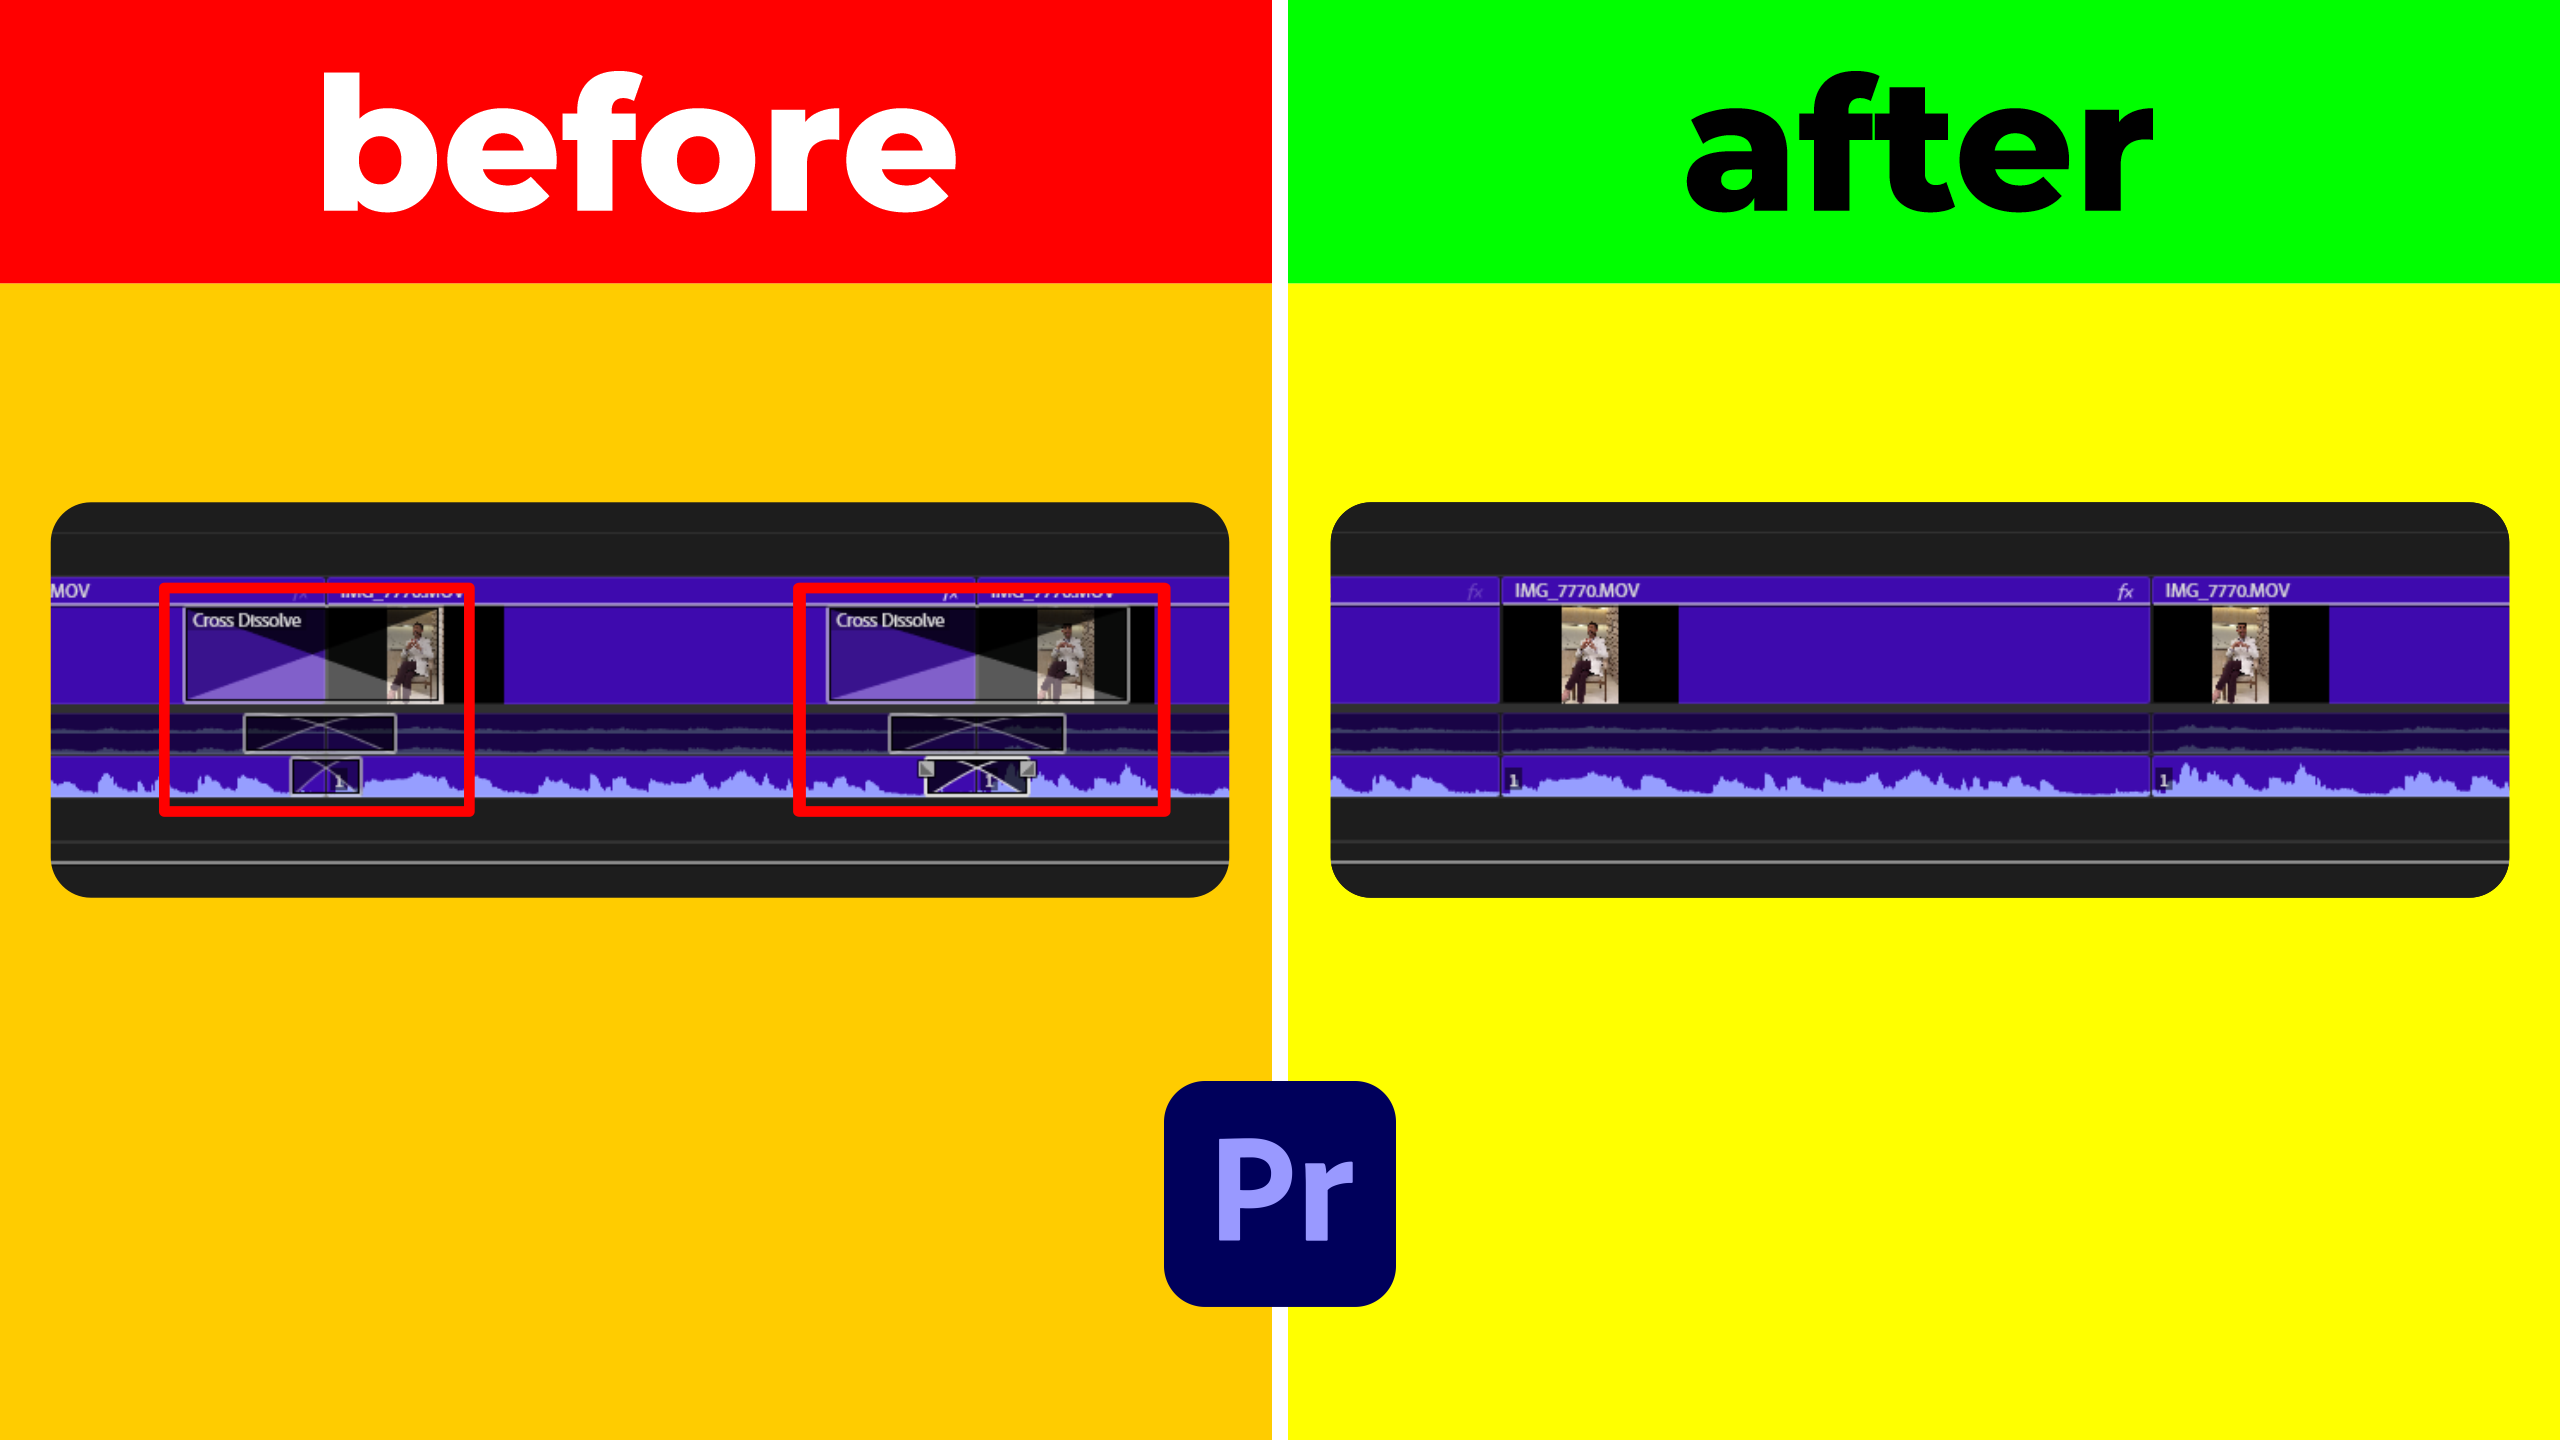
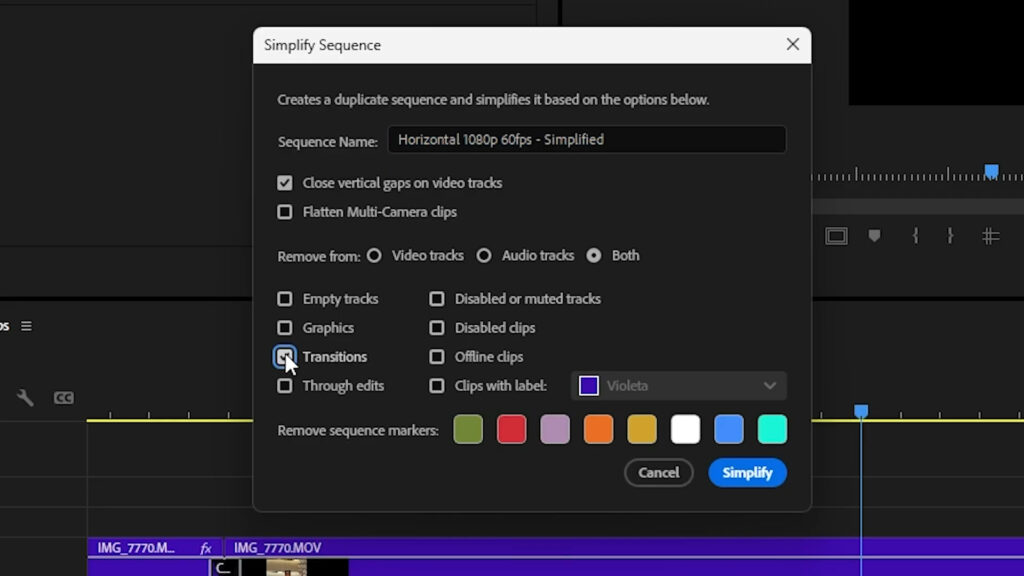
Click on the Sequence tab in the top menu, then select Simplify Sequence. In the dialog box, choose Transitions and pick Video Tracks, Audio Tracks, or Both. Click Simplify, and Premiere Pro will generate a new sequence without any transitions.
Verifying and Refining Your Timeline
Switch to the newly created sequence to confirm that all transitions are gone. If you only needed to clear audio transitions, repeat the process but select Video Tracks instead of both. This flexible approach ensures you can target specific track types.
Benefits of Removing Transitions
- Save time by avoiding manual deletion of each transition keyframe.
- Maintain a clean timeline when re-editing or exporting XML/EDL files.
- Optimize project performance by eliminating unused effects.
Further Resources
For more workflow optimizations, explore our Premiere Pro tutorials. You can also read Adobe’s official guide on sequence management in Premiere Pro for detailed insights: Editing sequences documentation.