
Premiere Pro zoom effect can significantly enhance your video editing skills. Whether you want to highlight an important detail or create a dynamic transition, zooming in on a specific part of your video can add a professional touch. In this guide, we’ll show you a simple yet effective zoom hack that will make your edits stand out.
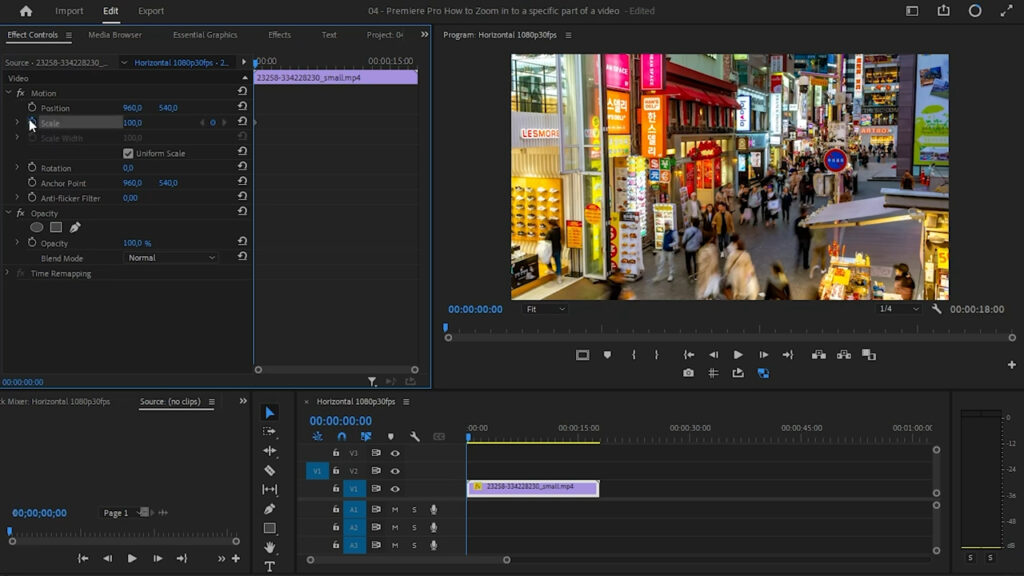
Step 1: Create a Scale Keyframe
The first step to zooming in on a specific area of your video is setting up a keyframe for scaling. Follow these steps:
- Select your video clip in the timeline.
- Go to the Effect Controls panel.
- Find the Scale option and click on the stopwatch icon to create a keyframe.
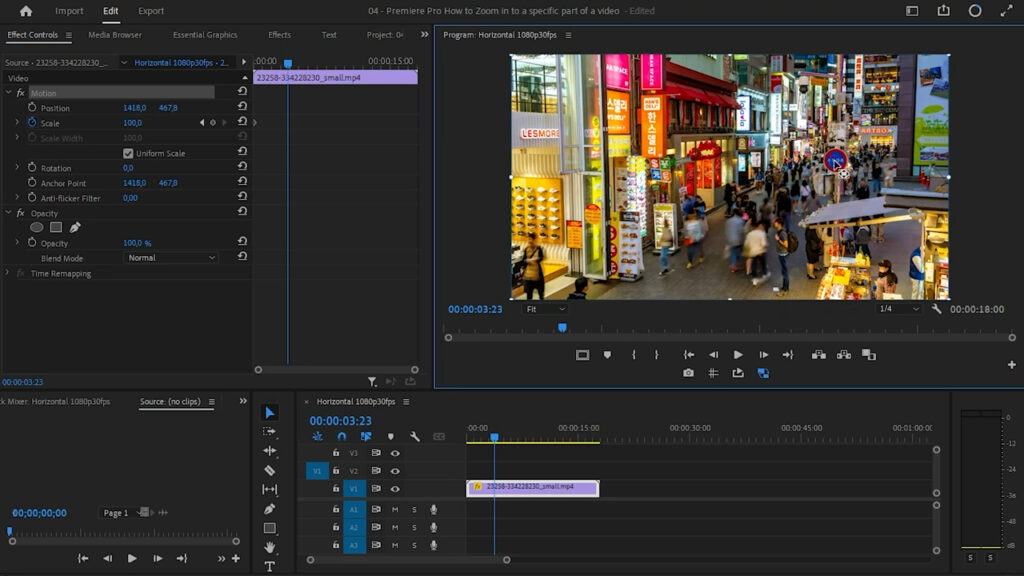
Step 2: Position the Zoom Focus
Next, move forward a few seconds in the timeline to determine where the zoom effect should take place. Then:
- Double-click on the preview window.
- Use the central circle to position the zoom focus on the area you want to highlight.
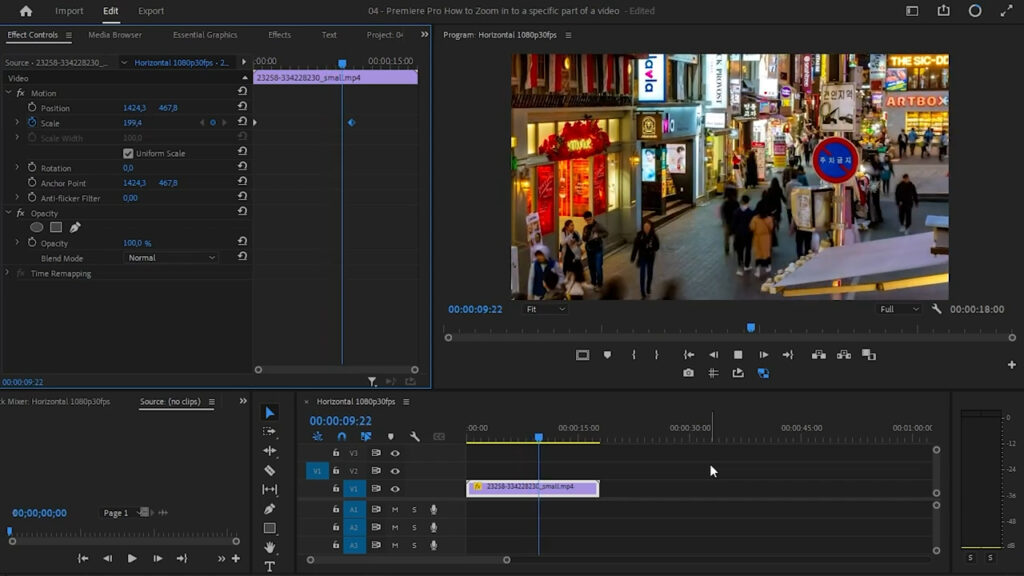
Step 3: Adjust the Zoom Level
Now that you’ve positioned the zoom, it’s time to increase the scale:
- Go back to the Scale settings in the Effect Controls panel.
- Increase the scale percentage until the desired zoom level is reached.
As a result, your video will smoothly zoom into the selected area, creating a professional and eye-catching effect.
Conclusion
Using this simple zoom hack in Premiere Pro can make your edits look more dynamic and engaging. Whether you’re emphasizing an important scene or adding motion to still footage, this technique is easy to apply and highly effective.
For more video editing tips, stay tuned to our blog!