In this guide, you will learn how to End Songs with Echo Reverb in Premiere Pro 2025. By using nested sequences, black video placeholders, and the built‐in Studio Reverb effect, you can create a polished, professional fade‐out that leaves your audience with a lingering echo. Follow these steps to craft a seamless ending with echo reverb on any track.
1. Cutting the Audio Section for Echo Reverb
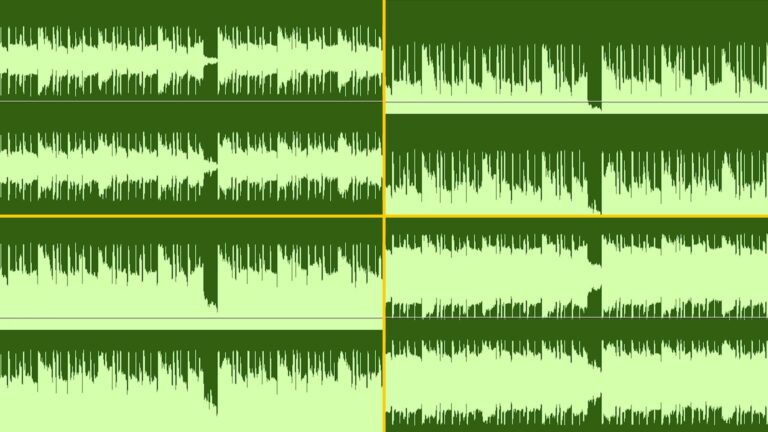
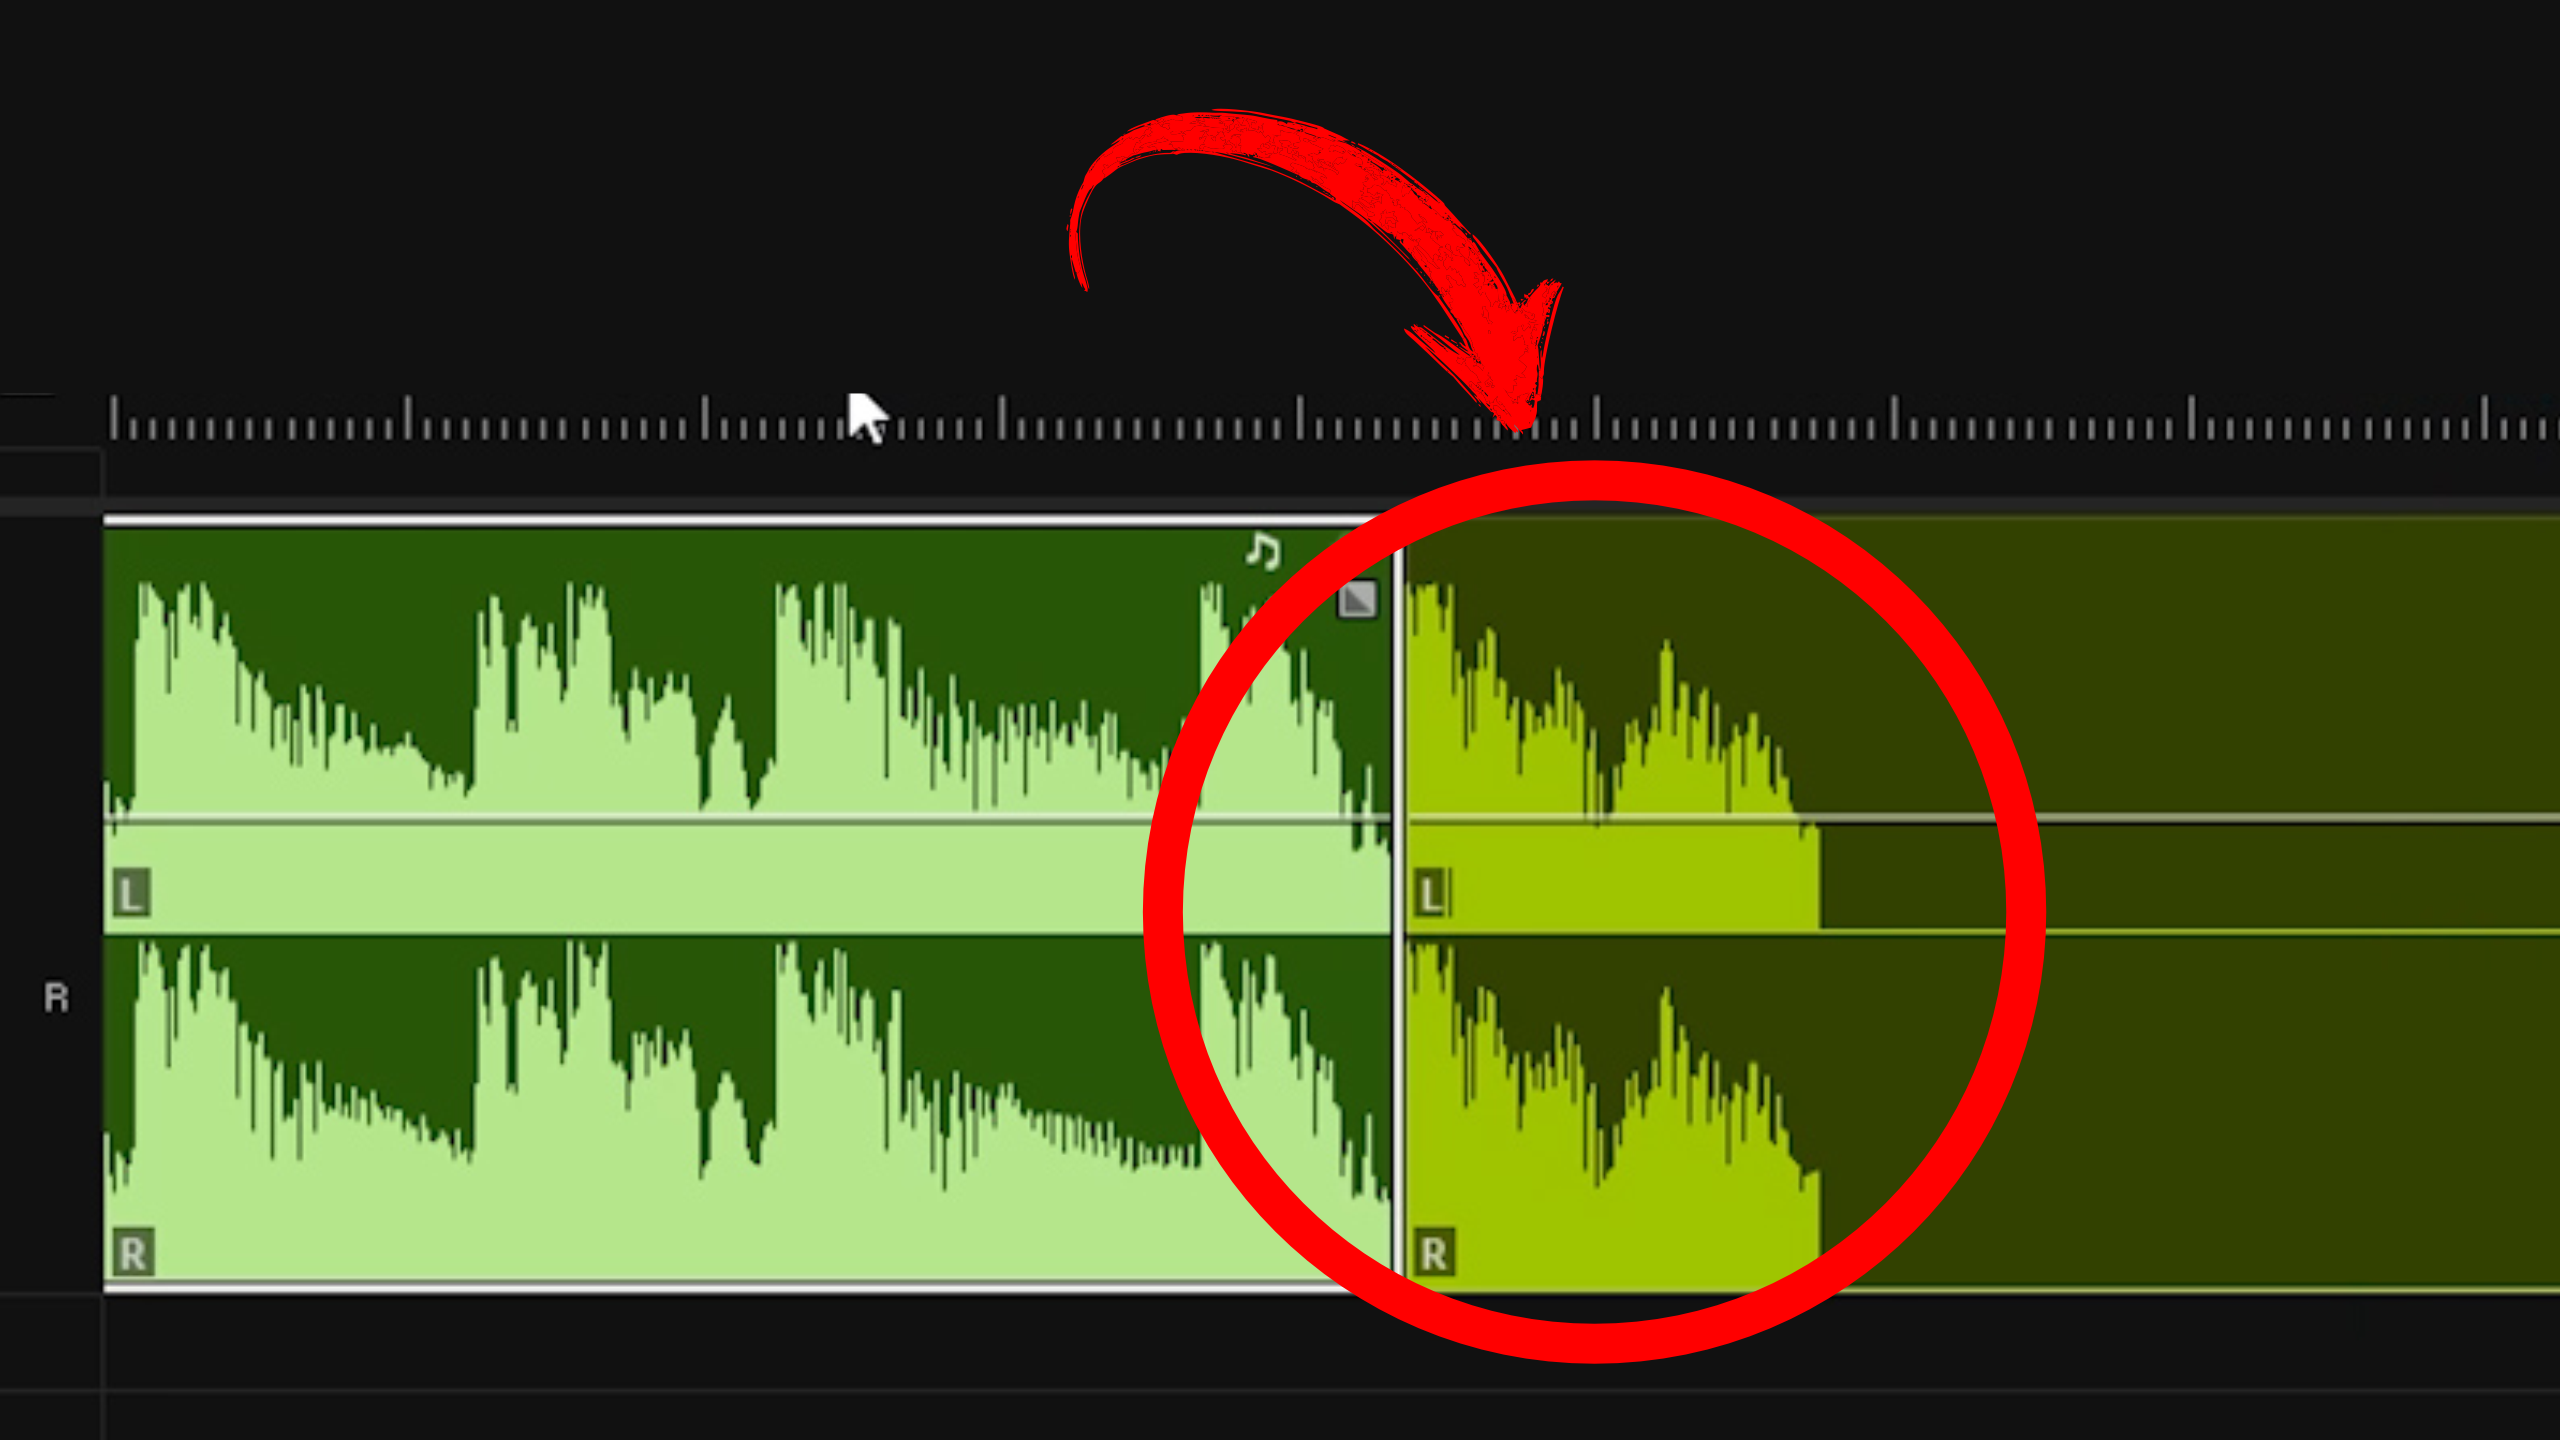
Begin by opening your main sequence in Premiere Pro 2025. Move the playhead to where you want the echo reverb to start. Press Ctrl+K (Windows) or Cmd+K (Mac) to make a cut at that exact point. Next, move the playhead to where you want the echo reverb to end—usually after at least 10 seconds of sustained echo—and cut again. Delete the audio outside this selected range, leaving only the segment that will receive the echo reverb. By trimming precisely, you ensure the echo fits perfectly at the end of the song.
2. Nesting the Selected Audio Segment
With the trimmed audio clip selected, right‐click and choose Nest…. Name the nested sequence (for example, “Echo_End”) or accept the default, then click OK. This grouping creates a new nested sequence containing only the audio section for echo. Double‐click the nested sequence in the timeline to open it in a separate tab. Nesting isolates the audio, making it easier to apply complex effects like echo reverb.
3. Adding a Black Video Placeholder
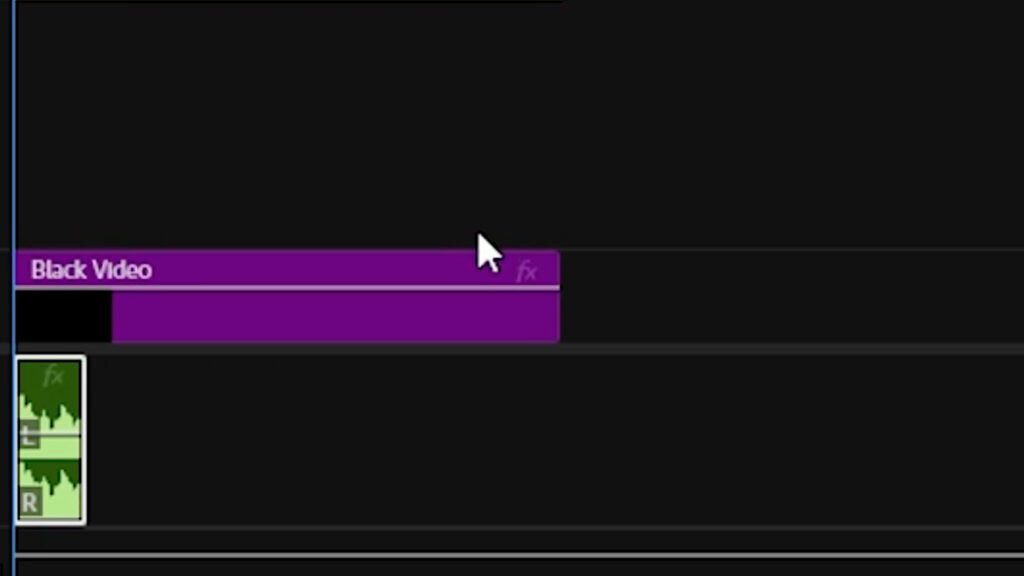
Inside the nested sequence, go to the Project panel and click New Item → Black Video. Click OK to create a black video clip matching your sequence settings. Drag this black video onto the nested timeline, positioning it above your audio clip. Extend its duration to at least 20 seconds so that the echo has sufficient time to decay. The black video acts as a reference, allowing you to see exactly how long the reverb will last in the final mix.
4. Applying Studio Reverb in the Main Sequence
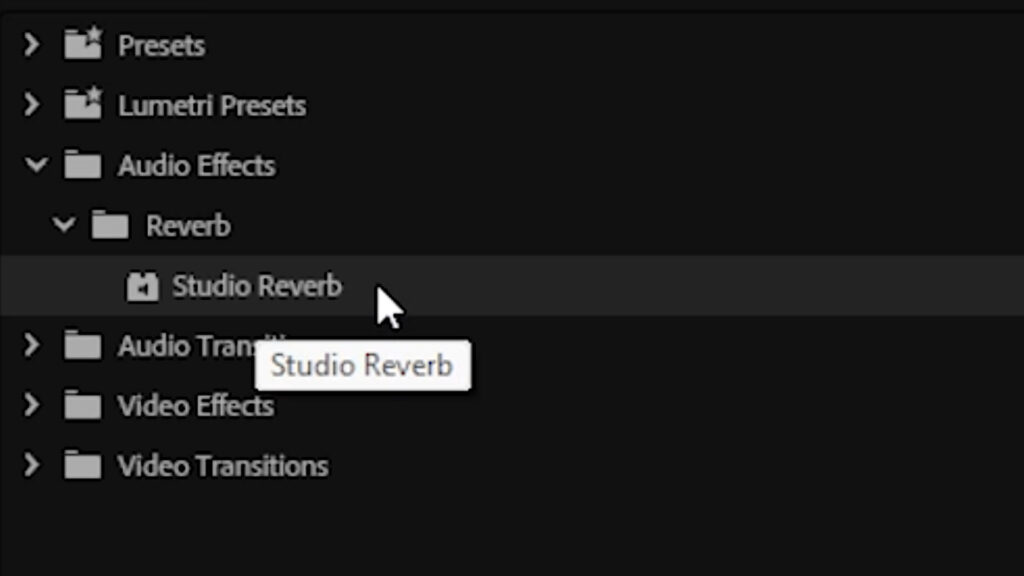
Return to your main sequence by clicking its tab. Select the nested sequence named “Echo_End.” Open the Effects panel and search for Studio Reverb. Drag the Studio Reverb effect onto the nested clip. This step effectively places the echo reverb on the isolated audio segment chosen for your song’s ending.
5. Configuring Echo Reverb Parameters
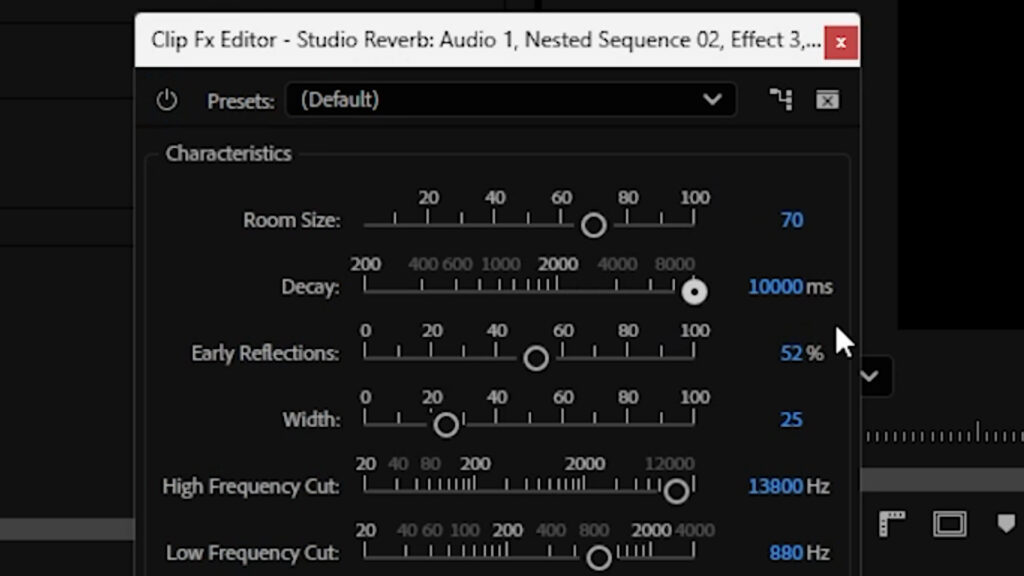
With the nested clip still selected, navigate to Effect Controls. Locate the Studio Reverb effect and click Edit or Custom Setup to open the parameters window. Increase the Decay to its maximum—setting it above 5 seconds (5000 ms) will let the echo linger naturally. Adjust the Wet/Dry Mix to around 60–70% wet so that the echo is prominent but not overpowering. Finally, choose a Preset like “Great Hall” for a spacious, dramatic echo. You are now well on your way to End Songs with Echo Reverb in a cinematic style.
6. Extending and Fine‐Tuning the Echo Section
Back in the main sequence, click and drag the right edge of the nested sequence to ensure it lasts at least 10 seconds—long enough for the echo tail to play out. Play the timeline to audition your echo effect. If you feel the section you chose for echo doesn’t fit the song’s ending, double‐click the nested sequence to return inside, trim the audio clip or adjust the black video duration, and then preview again in the main sequence. This iterative approach lets you tailor exactly how your track will End with Echo Reverb.
7. Experimenting with Different Presets for Echo Reverb
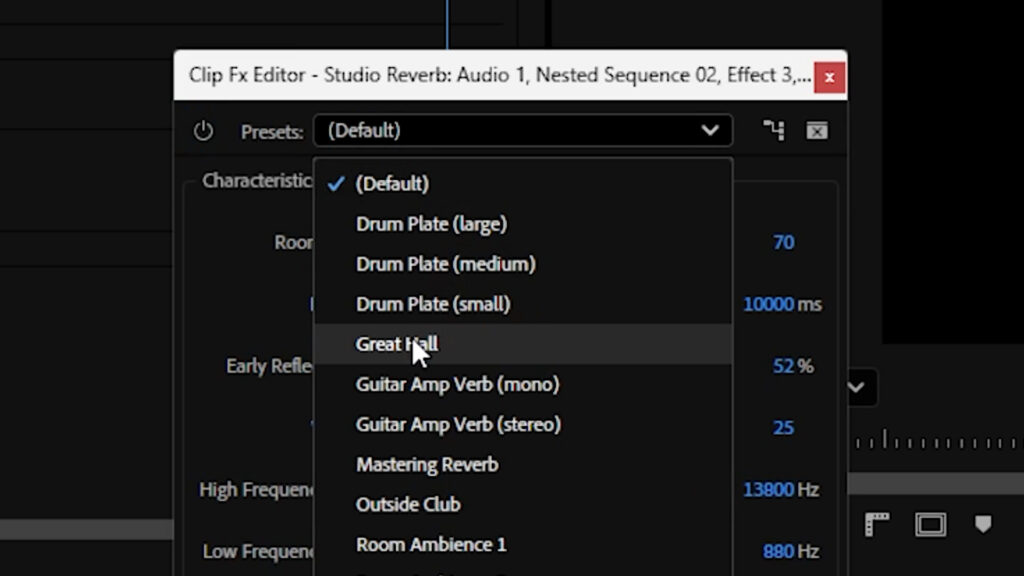
Within Studio Reverb, switch presets to explore varied echo textures. “Cathedral” offers long, diffuse reflections, while “Room Medium” gives a tighter, more controlled echo—ideal if you want the echo to die quickly. Always maintain a high Decay setting when testing presets to emphasize the reverb tail. Listen critically until you find the preset that makes your song’s ending feel most impactful.
8. Final Tips for a Clean Echo Fade‐Out
- Render for Smooth Playback: Press Enter to render the nested section so you can hear the echo in real time without stuttering.
- Use Headphones: High‐quality headphones help you discern subtle echo tails and high‐frequency reflections.
- Automate Volume: If the echo feels too loud compared to preceding audio, add volume keyframes before the nested clip to fade the track into the echo smoothly.
- Combine Effects: For extra depth, layer Studio Reverb with a gentle Echo Delay effect, creating a cascading echo before the full reverb tail.
9. Conclusion
By following this tutorial, you can confidently End Songs with Echo Reverb in Premiere Pro 2025. You learned how to make precise audio cuts, nest the segment, insert a black video placeholder, apply and configure the Studio Reverb effect, and fine‐tune presets and decay settings. The result is a professional‐quality echo fade designed to leave a lasting impression. For more audio tips, explore our Premiere Pro tutorials and dive deeper into the official Adobe Premiere Pro Audio Effects & Transitions guide. Ready to create unforgettable endings? Implement these steps and watch your songs fade out in dramatic, echoing style!