Freeze frames in Adobe Premiere Pro is a great technique to emphasize key moments in your videos. Whether you want to pause for dramatic effect, highlight an important detail, or create a stylish transition, mastering the freeze-frame effect will enhance your editing skills. In this guide, we’ll show you a simple and effective way to freeze frames like a pro.
Step 1: Position the Playhead
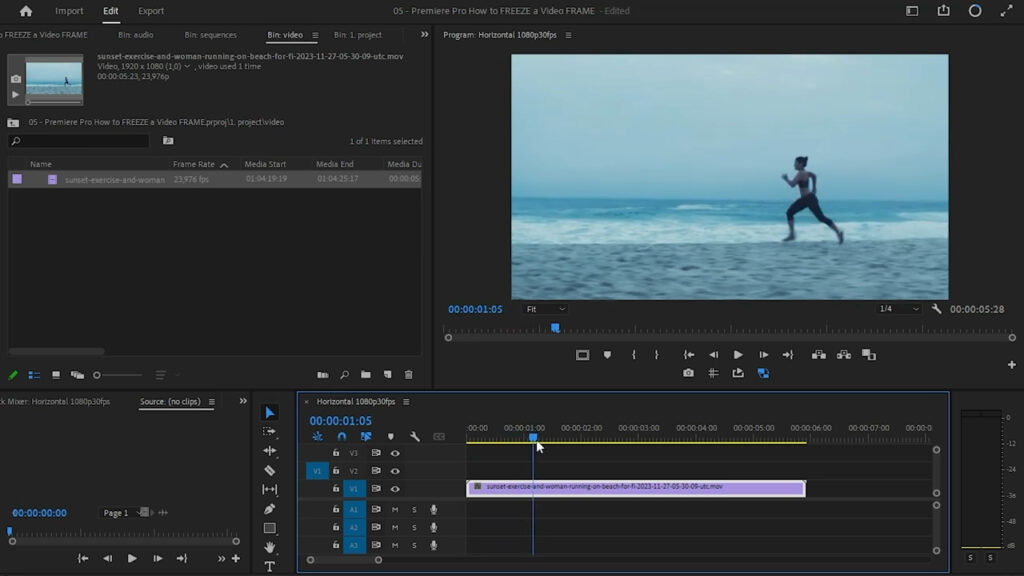
The first step in freezing a frame is selecting the exact moment you want to pause. To do this:
- Play the video in the timeline and pause at the desired frame.
- Make sure the clip is selected.
Step 2: Apply the Freeze Frame Effect
Once you’ve chosen the frame, follow these steps:
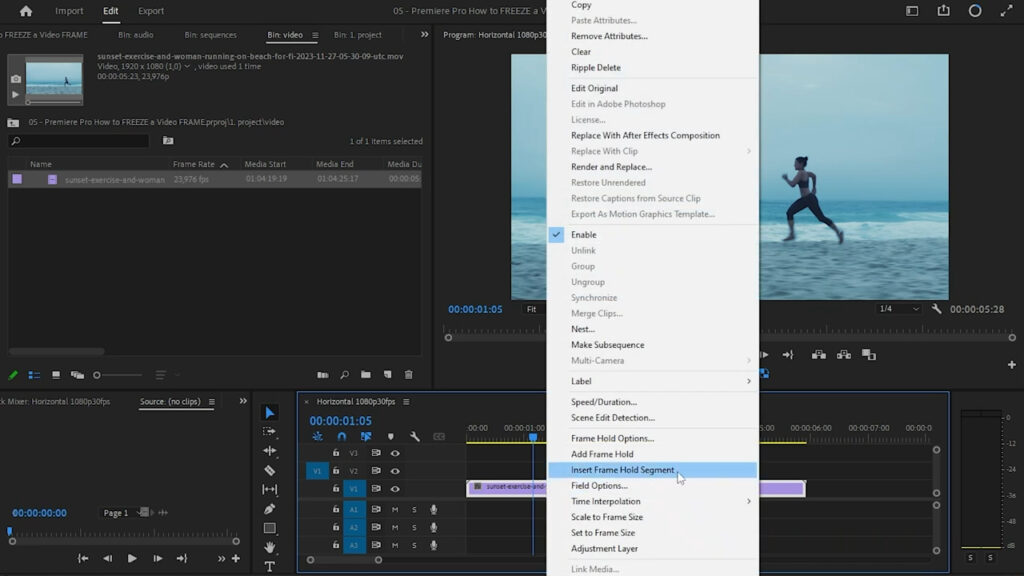
- Right-click on the video clip in the timeline.
- Select Insert Frame Hold Segment.
- The selected frame will now be frozen, and the video will continue playing normally after it.
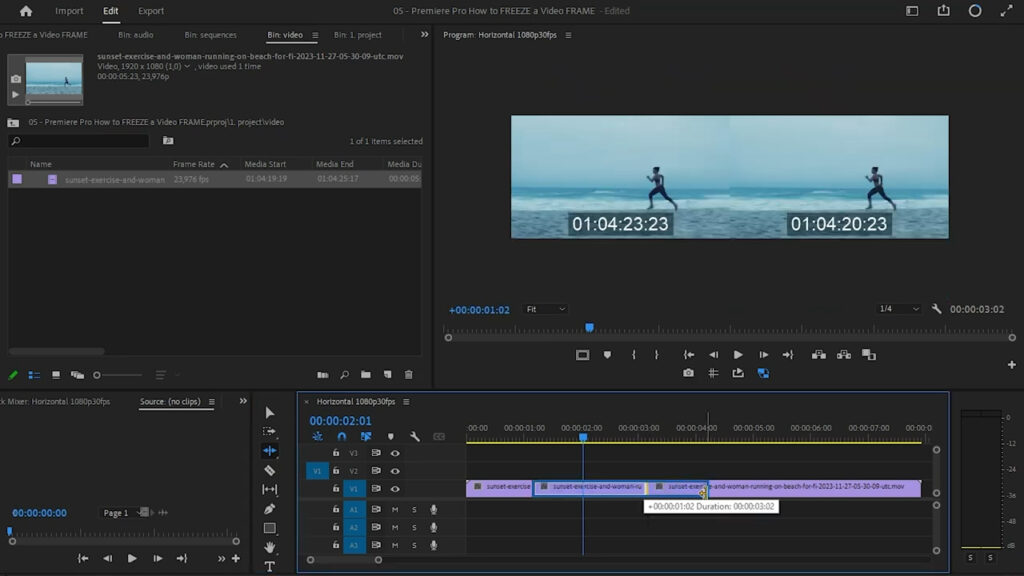
Step 3: Adjusting the Freeze Frame Duration
By default, the freeze frame will last for a short period. To extend its duration:
- Select the Ripple Edit Tool.
- Click and drag the frozen frame to make it as long as needed.
This is especially useful for creating a dramatic pause or adding text and effects over the frozen frame.
Conclusion
Using the freeze frame effect in Adobe Premiere Pro is a simple yet powerful technique to improve your video storytelling. Whether you need to emphasize an action, create a transition, or add creative effects, mastering this feature will take your edits to the next level.
For more video editing tips and tricks, stay tuned to our blog!